How to assemble your Window.
Below is a guide to assembly of your kit form window, if you require any further assistance please call us 01782 980468.
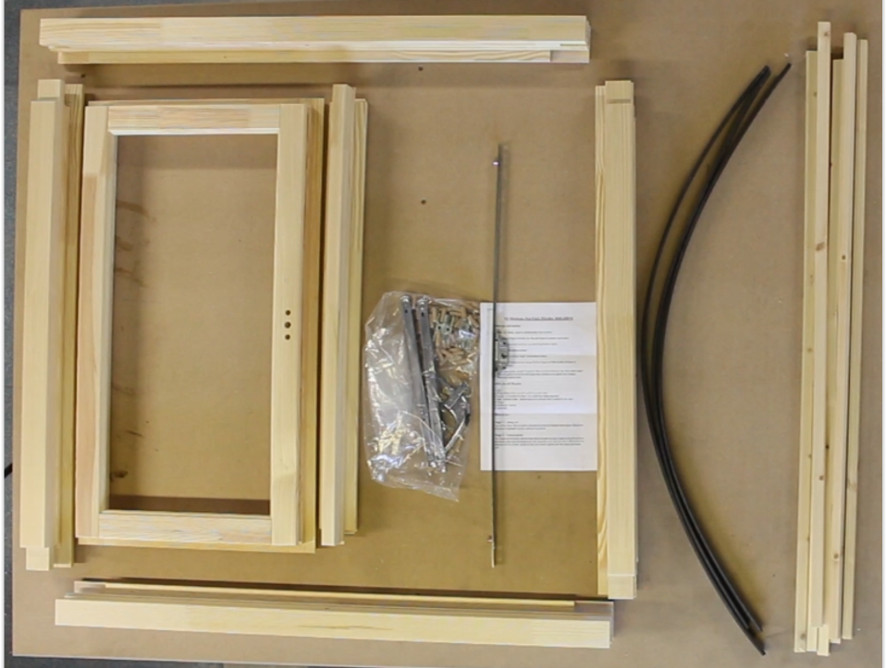
What you receive
- Head, Cill, Jambs, Transom / Mullion (Loose).
- Casements (Assembled ready to fit appertures)
- Glazing bead loose for cutting to length
- Casement gasket loose for cutting to length
- Espagnolette multipoint locks with keeps & handles
- Friction Hinges
- Glass sizes can be provided if required
What you will require
- Drill / driver
- Rubber Mallet
- Screws - 5.0 x 80mm for frame, 4.0 x 25mm for hinges and locks
- Glue - External Grade - please ensure all glue surfaces are clean before assembly
- Large clamp or strap
- Sandpaper / Sander
- Craft Knife
- Measuring tape (to check square)
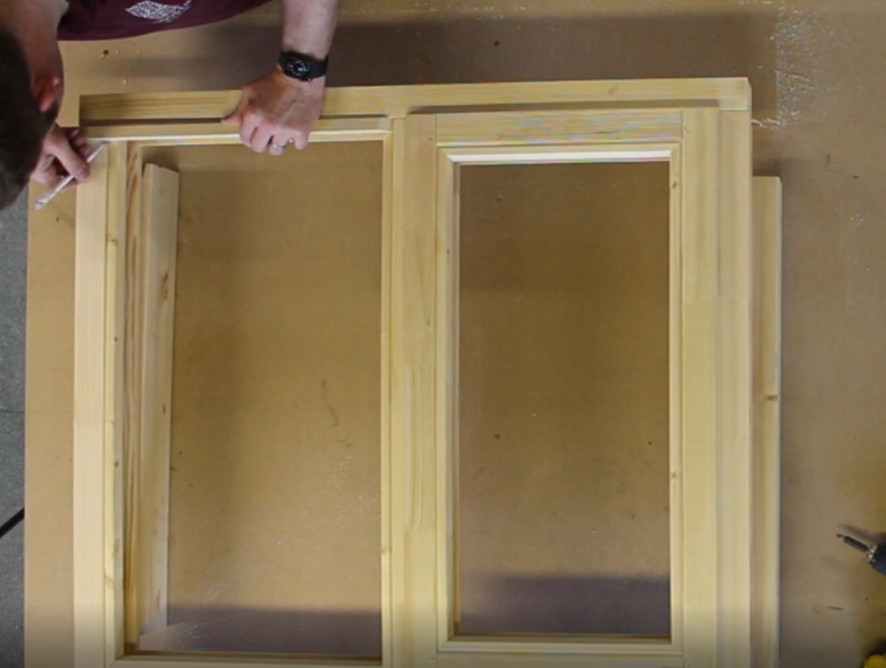
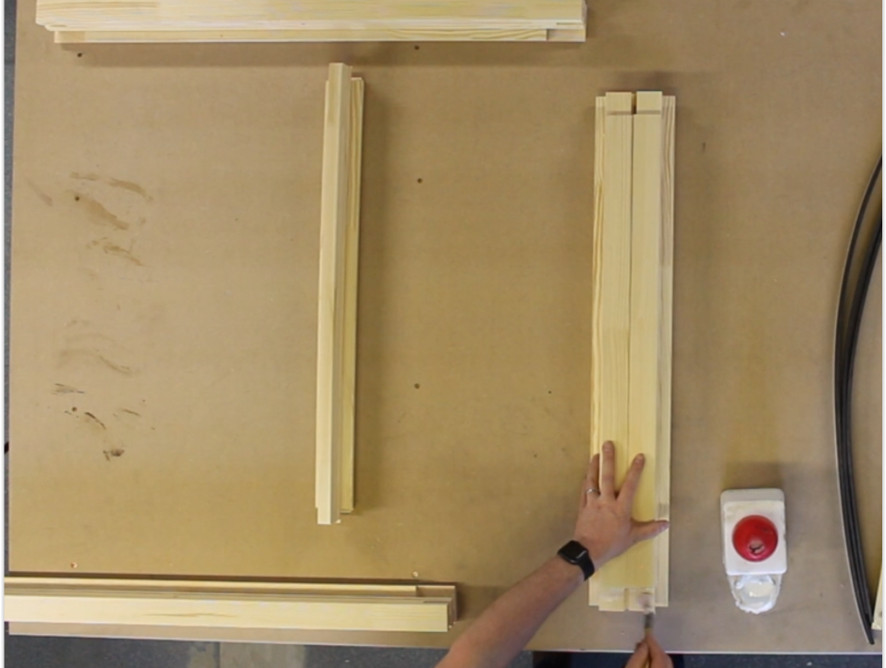
Lay out The Head, Cill and Jambs (dependent on style the transom and mullion) Ensure the cill groove if applicable is to the bottom of the window.
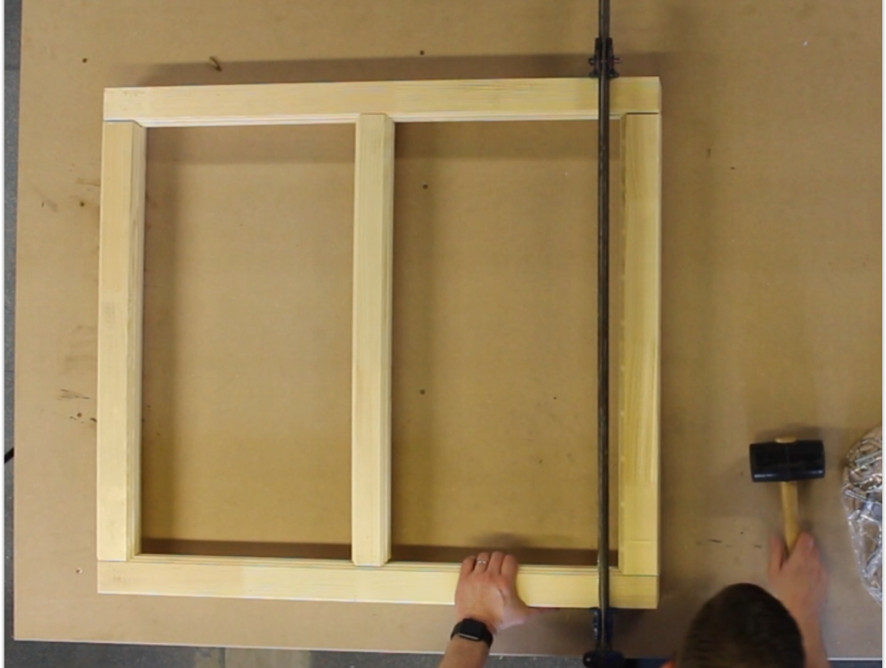
You should now be happy with the frame layout so grab your glue, apply to all joints (mortice and tenons along with the dowels) and then slot the components together, your transoms and mullions are to be attached with the dowels, the jambs head and cill slot together with the mortice and tenon joint.
To ensure all joints are tight and flush, tap them together using your mallet. Use a clamp to close any tight joints.
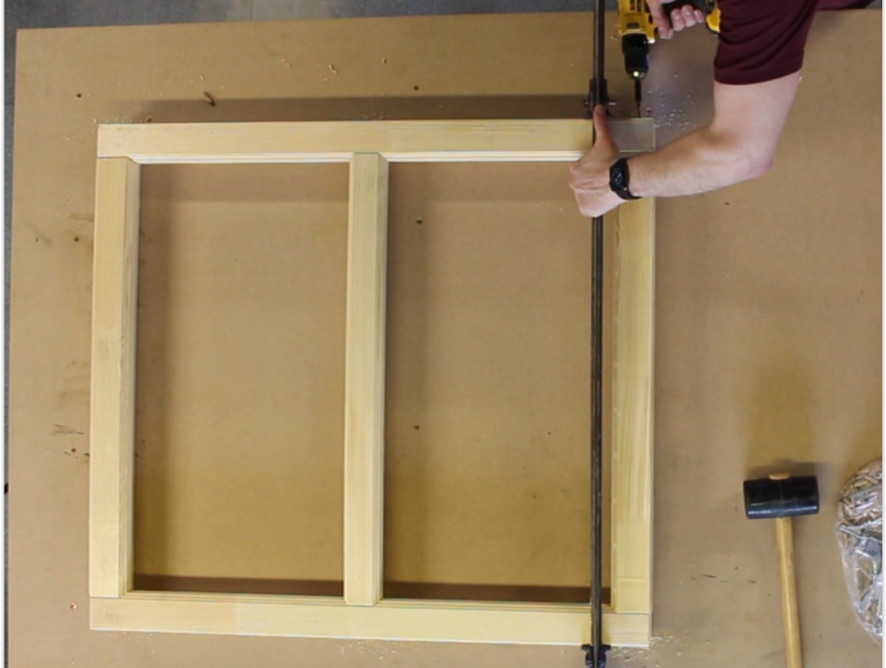
Drill 5.0mm pilot holes through the top of the head and the base of the cill for your jambs. Use your 5.0 x 80mm screws to secure the jambs in place.
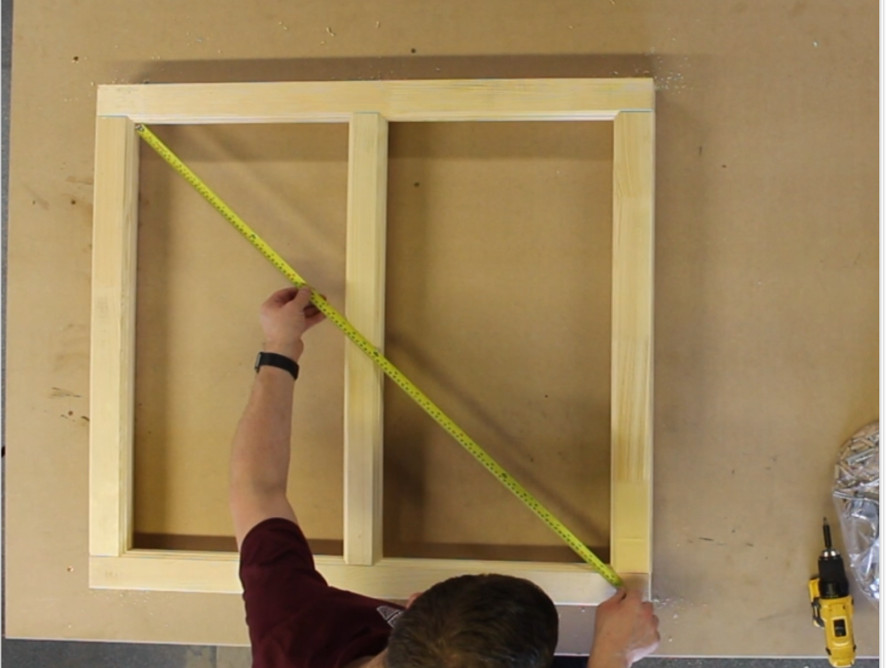
It is VERY IMPORTANT at this stage to Check that the frame is square by measuring corner to corner across both diagonals of the window (both diagonal measurements should be identical). Also, check the width and the height measurements.
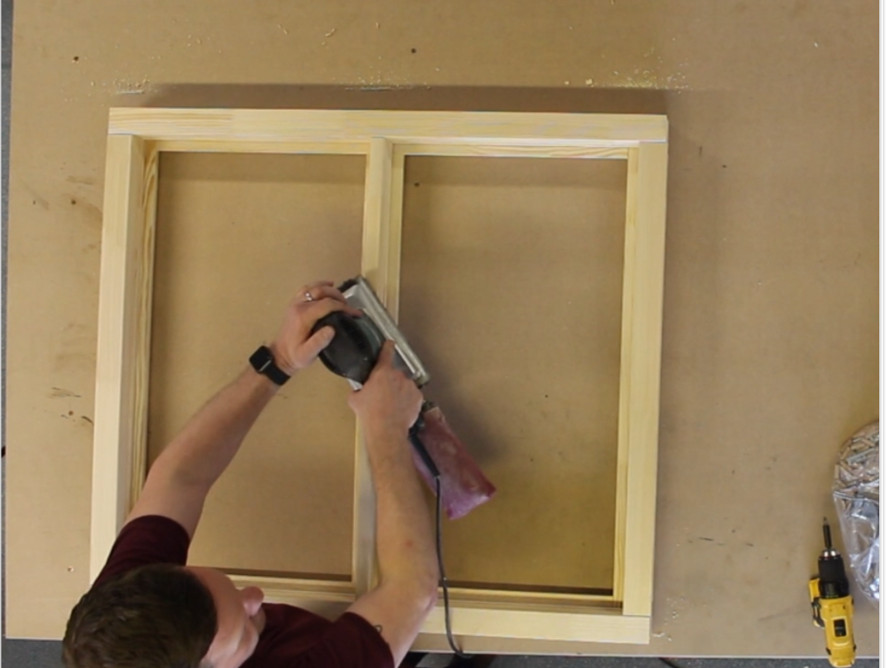
Clear any excess glue from the frame using a damp cloth. Next, sand the window and casement until happy with the finish
Clear any dust then apply Glue to the cill and drip mould then push into the grooves on the window face, for the cill to the base of the window and for the drip to the head of the window. Leave the glue to dry based on the glue manufacturer’s recommendations.
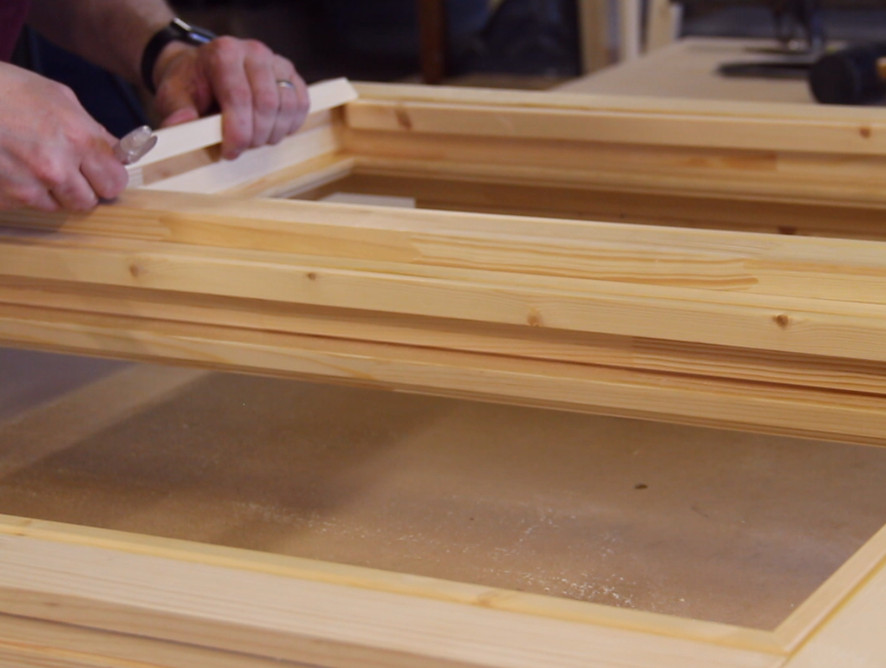
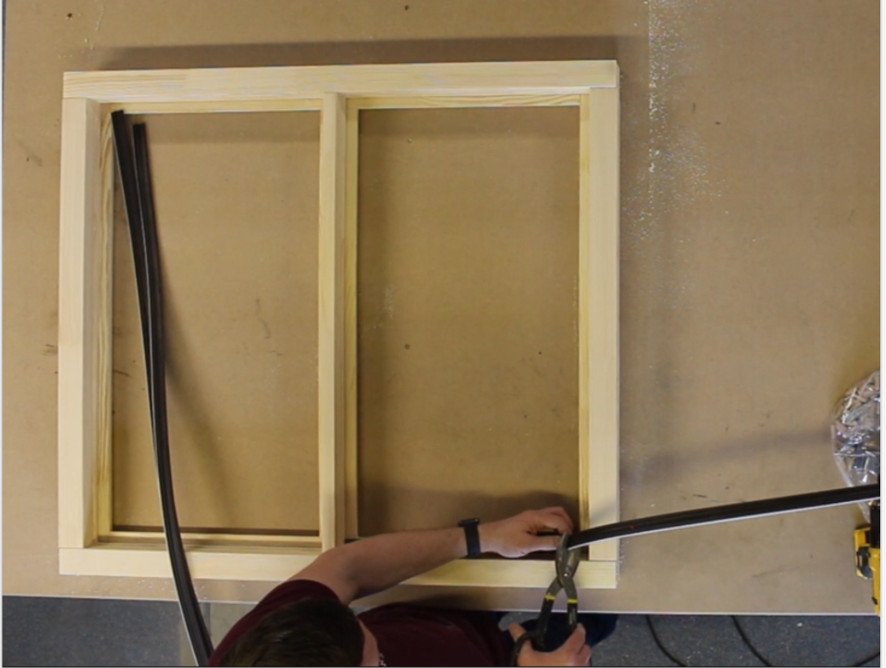
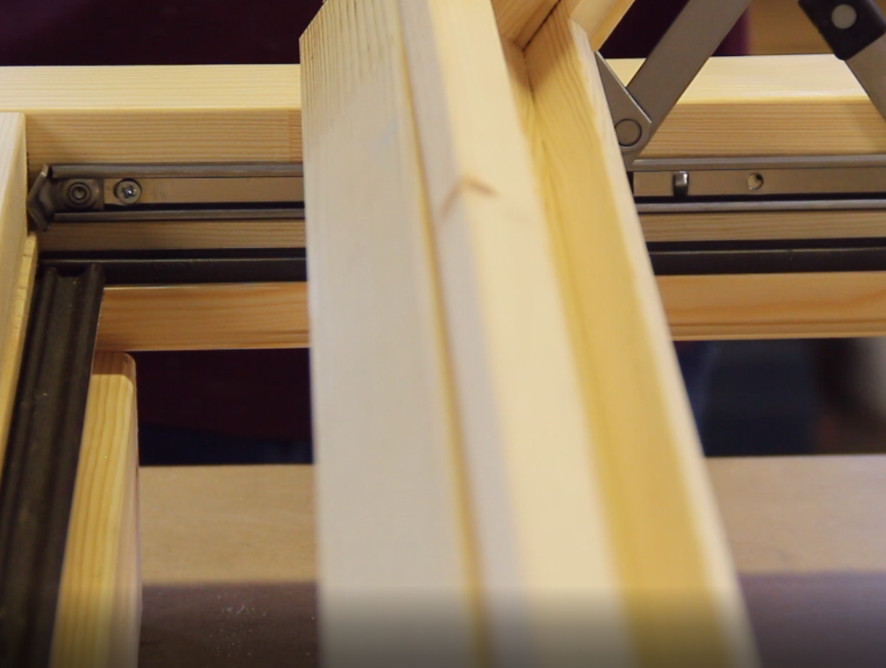
Cut the gasket to length with your craft knife, you can line this up with the gasket groove, install the gasket into the gasket groove starting with the top and bottom finishing with the sides.
Fit handle, multipoint lock to casement with the 4.0 x 25mm screws.
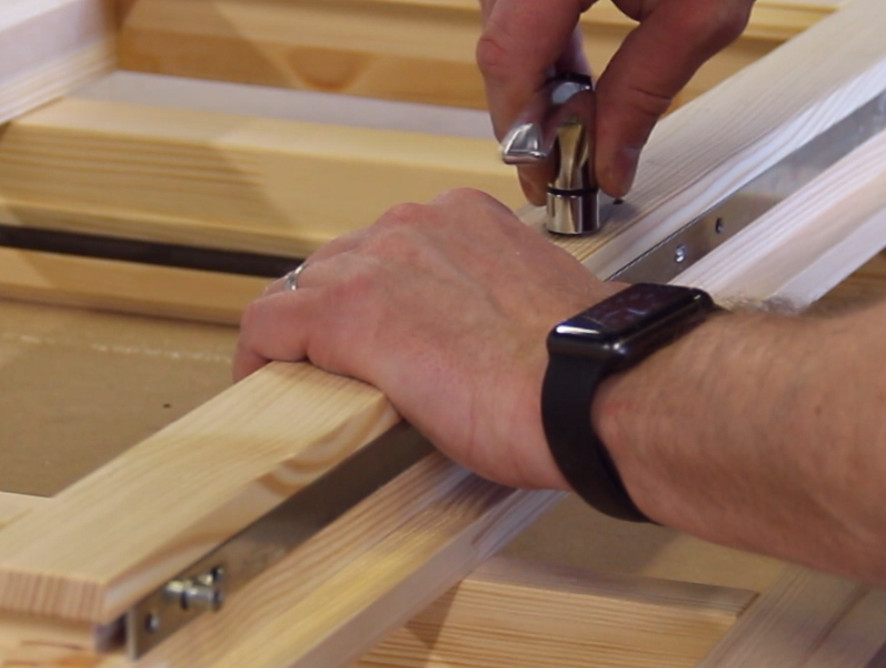
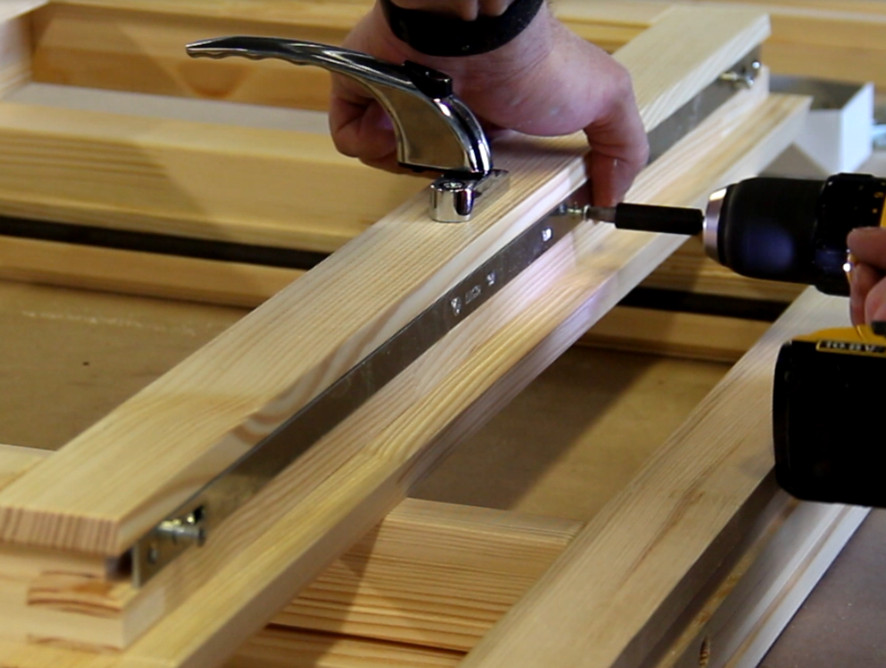
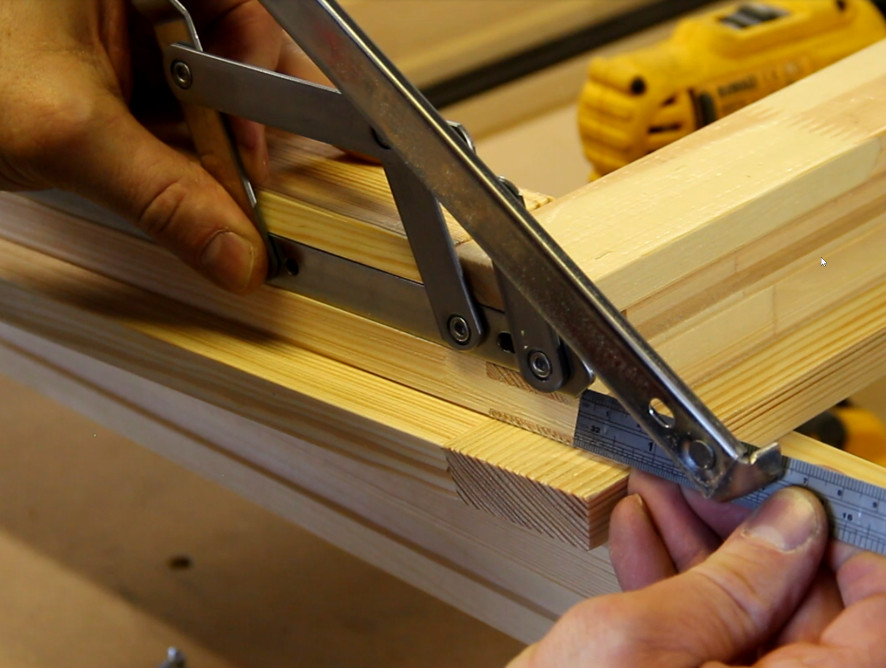
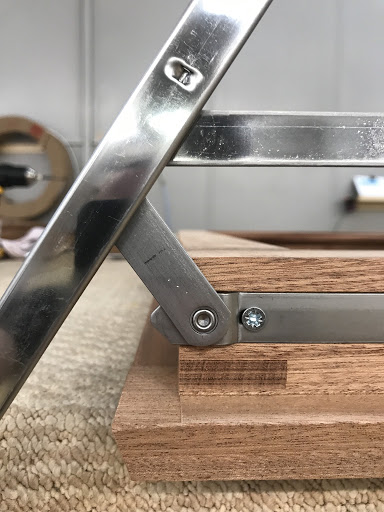
First fix the friction hinges to the casement - using a ruler to measure approximately 3mm from the rebate on the casement to the end of the flat on the hinge (before it starts to bevel at 45degreese). Fix the hinges using 4.0 x 25mm screws. Next, with the hinges opened drop the casement into the frame. Slide the hinge up to the jamb and fix in place, again with 4.0 x 25mm screws.
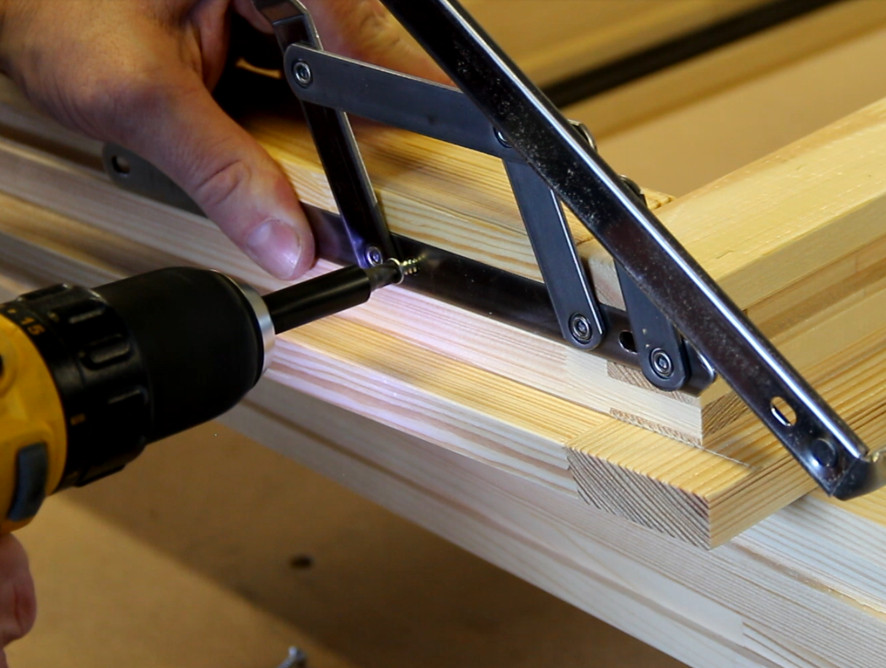
Position keep up to the small rebate, and in line with the locking mechanism. Fix into place using 4.0 x 25mm screws. Check the operation of the casement and locking mechanism. Adjust hinge position if casement struggles to lock / unlock (the 3mm in step #10).

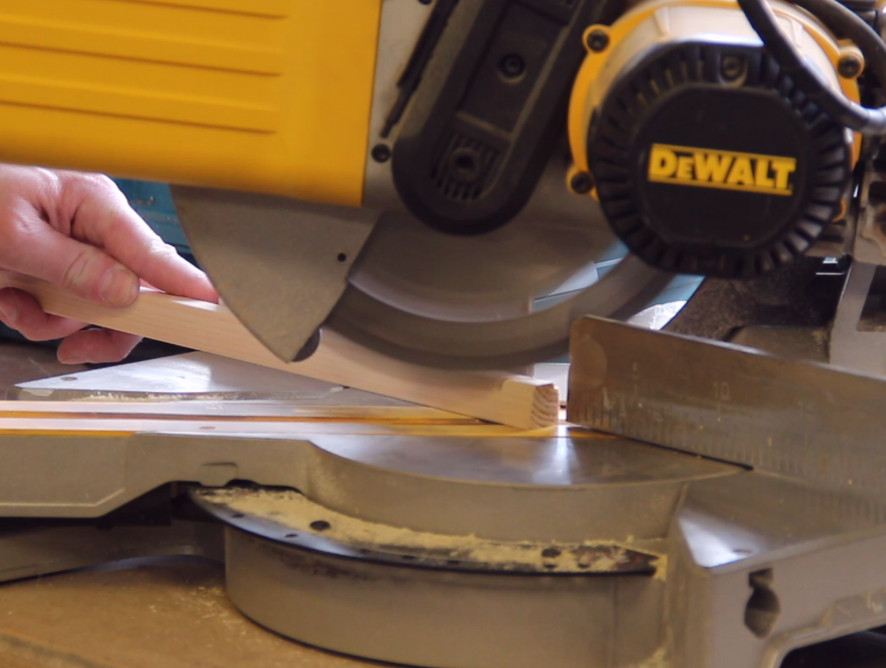
Mitre glazing beads to length.